Sketching as introduced in Revit Concepts lets you create building elements such as floors roofs and ceilings by drawing the boundaries. Revit 2-day 6-Week Online Courses.

Revit Tutorial Creating A Section Presentation Drawing In Less Than 7 Minutes Revit Tutorial Building Information Modeling Architecture Program
Ad Best Revit Training 2022 - Revit Course - 100 Become Revit Expert - Try Now.

. Help Jul 07 2021 In-product view SHARE. A good tip is to add a number prefix at the beginning of all view names. Beginner Workflows for Architecture Start a New Project Before You Begin Set Up the Project Create the Site Plan Build the Model Collaborate with Others Document the Model Present the Project see complete table of contents In-product view Start a New Project Products and versions covered By.
In the Type Selector select the duct type. Now Open for September 2021. In your BIM standards make sure to have a clear way to name views.
5- ACTIVATE ANTI-ALIASING Aliasing occurs in a drawing when angled lines appear pixelated. Watch video 325 min Create a boundary sketch. Remember that a view can only exist on one sheet.
If you want to show it twice youll need to duplicate the view and assign each to a separate sheet. Its the result of 2 years of research and experimentation to help you create beautiful gorgeous drawings using Revit. Keep your project browser organized else youre going to be in Hell.
No Package or Subscription Required. Ace Your Object Selection Skills 5. Go to the Graphic Display Options menu.
6- USE CUSTOM ENTOURAGE. Click on the wall then make sure the side is properly placed. Drag and drop views onto the sheets.
Create a type of window for each size you need. Hi Im working with Revit since one month. Avoid Accidental Double-Clicks 6.
Under Model Display check the Smooth lines with anti-aliasing box. Ad Find Affordable Experienced Tutors At Wyzant. To create a new sheet go View Sheet Composition Sheet.
Learn Keyboard Shortcuts 4. If you already understand the fundamentals the Basic tasks and Project management articles show you how to. Im at an internship abroad Ireland and my teachers here are working with revit for 1 year.
Dont just latch on to free components 3. Choose a Template There are a lot of template options but most of the time Generic Model Face Base should be a good template to use. 92 rows Learn about the relationship between Levels and Views in Revit.
Never Meddle with Backup Settings 8. The Revit Quick Start Guide helps you improve your skills. For first-time users Key Revit concepts Revit drivers manual and the User interface tour are a great place to start.
Learn what the difference is and when sketch mode is needed. 1 Create the Revit Project Model File 2 Assign the Project Information 3 Create Grids for the Revit Model 4 Create Levels for the Revit Model 5 Locate the Project Base Point in the Revit Model 6 Create Standard Plan Views with the Desired Underlay Properties 7 Geolocate the Revit Model 8 Setting up Design Options in the Revit Model. Alternatively you can go to the Project Browser and right-click on Sheets and select New Sheet.
About Press Copyright Contact us Creators Advertise Developers Terms Privacy Policy Safety How YouTube works Test new features Press Copyright Contact us Creators. On the Options Bar specify layout options. 8 Tips for Revit Beginners 1.
Click Systems tab HVAC panel Duct or Duct Placeholder. You can see the effect of the parameters in the example below. 13- Dont Keep An Organized Project Browser.
Connect 1-On-1 Today Online or In-Person With the Tutor Of Your Choice. Before you start drawing think about how you want the family to act and how you want the user to interact with the final family. Optionally in the Properties palette under Mechanical select a system type.
They teached me to draw a wall just a simple wall and then you can edit this wall and name the right materials brick insulation cavity brickor something like this and then you have walls and floors with the right build up in its. Optionally to draw a vertical duct on the Options Bar specify an Offset that is above or below the start point and click. You can start adding windows.
Begin with small-scale pilot projects 2. The arrows symbol is located on the exterior side of the window so make sure to flip it if required. Learn Revit Certification Quickly - Best Revit Training - Top Revit Questions.
Sketch modes Several elements in Revit are sketched but not all require sketch mode. Take Full Advantage of Model Linking Cloud-based Worksharing System.

Revit Tutorial Exploded Axon Techniques Displaced Views Revit Tutorial Architecture Presentation Layout Design

Levels And Grids Beginning To End Revit Architecture Autocad Revit Grid
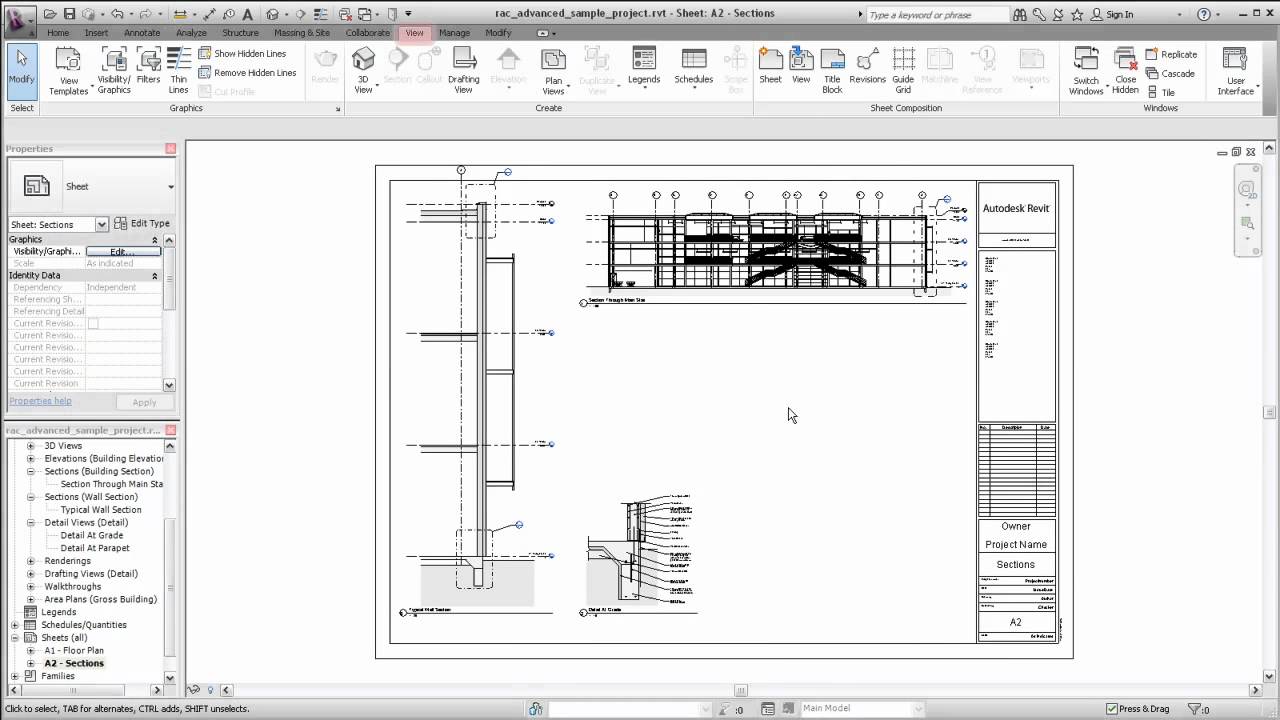
Autodesk Revit Creating Sheet Views House Plans Simple Floor Plans How To Plan

110 Tutorial How To Control Building Elevation Line Weights In Revit Architecture Building Elevation Revit Architecture Architecture
Know Your Revit Interface Revit Tutorial Building Information Modeling Revit Architecture

Nathaniel Richards Revit Sample Architecture Details Architecture Presentation Architectural Engineering
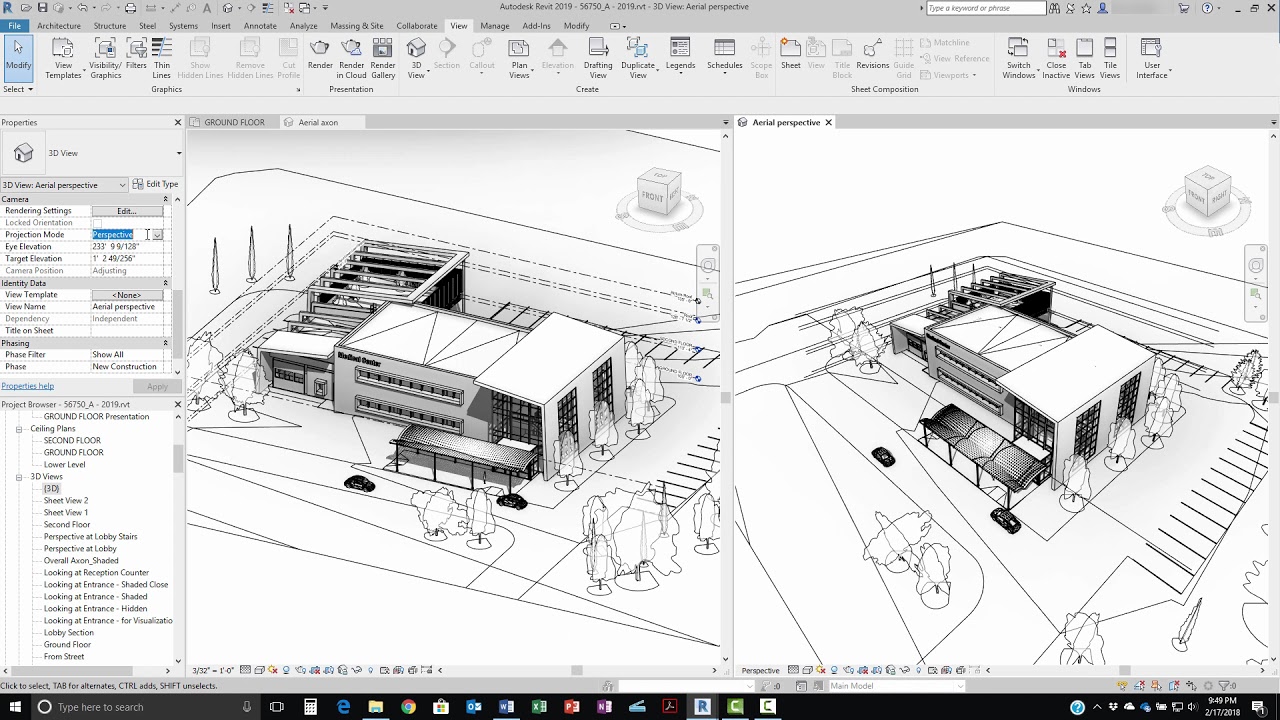
Youtube View Projection Modes Architecture Presentation Revit Tutorial Revit Architecture

Revit Tutorials Starting A Project Revit Tutorial Revit Architecture Building Information Modeling
0 comments
Post a Comment